I’m on a big earring kick lately and when you quickly need something to match a blouse, or just want a quick project, these crochet circle earrings are the way to go. I’ve chosen to do three circles from smallest to largest for my earrings but why stop there? You could create as many circles in whatever sizes and colors you want.
For this project instead of yarn, I’m using embroidery floss – it looks nice, doesn’t fuzz or fray when worked up, and it creates a smaller circle than even fingering weight yarn does – though you can really use any yarn you desire.
Crochet Circle Earrings Pattern
Crochet Circle Earrings

Materials
- Embroidery Floss
Tools
- 2 Earring hooks
- 6 Jump Rings
- 2.5mm Crochet Hook
- Jewelry Pliers
Instructions
- With color for smallest circle, make a magic circle, 8 SC in ring, SL ST in first stitch. Tighten, fasten off & Weave in ends.
- With color for 2nd circle, make a magic circle, 10 SC in ring, SL ST in first stitch. Tighten, fasten off & Weave in ends.
- With color for 3rd circle, make a magic circle, 10 HD in ring, SL ST in first stitch. Tighten, fasten off & Weave in ends.
- Using jump rings, attach circles to each other and the affix to earring hooks
I love that the color combination is absolutely endless for these earrings and that the price is definitely right with a few cents for each one. If you make them I’d love to see them, tag me on Instagram and Tiktok @imobsessedwithcrafting
Difficulty: Easy
Materials
- Embroidery Floss
Tools
- 2 Earring hooks
- 6 Jump Rings
- 2.5mm Crochet Hook
- Jewelry Pliers
Instructions
- With color for smallest circle, make a magic circle, 8 SC in ring, SL ST in first stitch. Tighten, fasten off & Weave in ends.
- With color for 2nd circle, make a magic circle, 10 SC in ring, SL ST in first stitch. Tighten, fasten off & Weave in ends.
- With color for 3rd circle, make a magic circle, 10 HD in ring, SL ST in first stitch. Tighten, fasten off & Weave in ends.
- Using jump rings, attach circles to each other and the affix to earring hooks


")


")


")


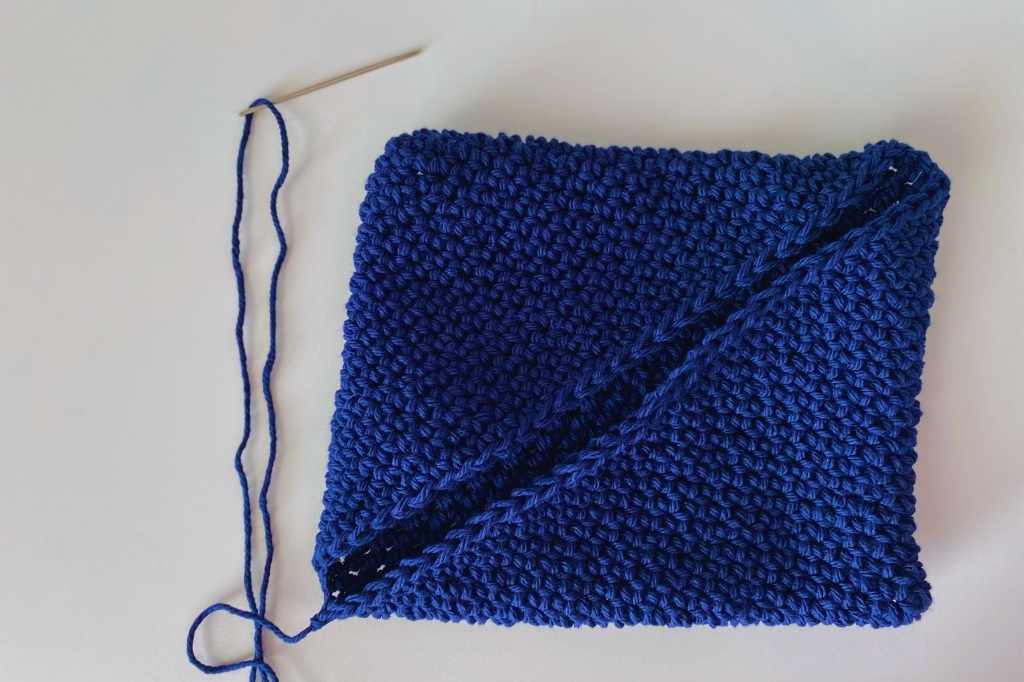
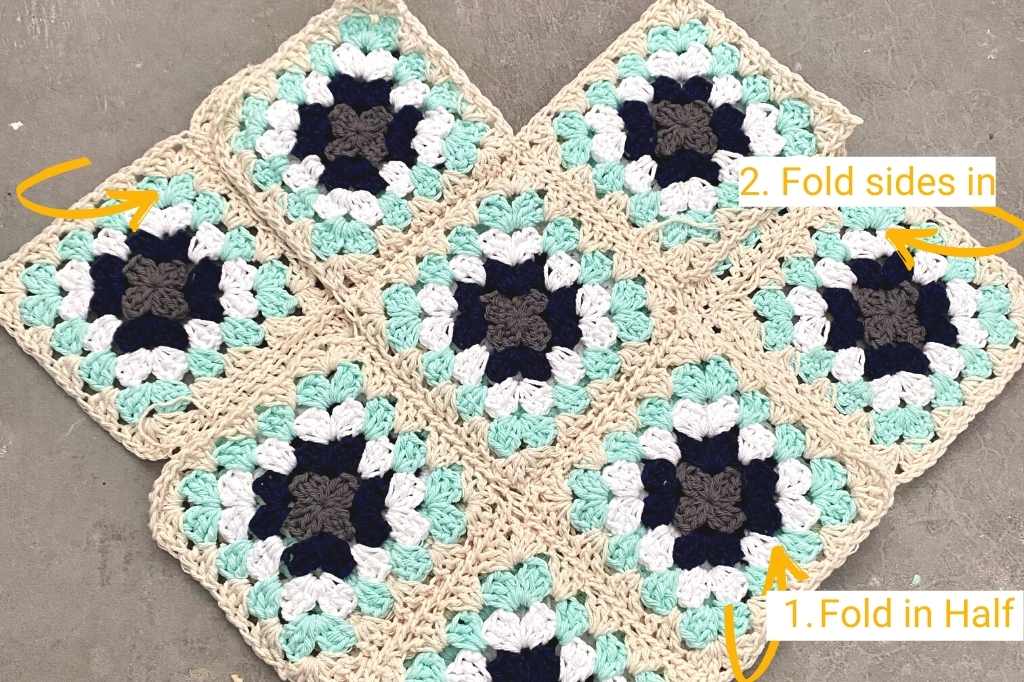 Fold the bag in half and sew