Top Posts
DIY Crochet Earmuff Patterns You’ll Actually Want to...
Pink Bow Baby Shower Theme
Table Cloth Bows for Baby Showers
Crochet Baby Bootie Centerpieces for Babyshowers
Free Haunting Handmade Item Caretag
What to Crochet for Halloween 2025
Tea Bag Gift Pouch
Scrappy Moss Stitch Coaster Pattern
The 20 Most Frequently Asked Crochet Questions Answered!
The Coolest Little Potholder Pattern
  • About
  • Crochet
    • Crochet Tips
    • Crochet Tools
    • Crochet Patterns
    • Crochet Printables
  • Crafting
  • Craft Organization
  • Contact Us
Hook and Paper
Make Something. You'll Feel Better.
Crochet Patterns

Magic Hanging Scrap Towel

by Brandy Burke March 10, 2025

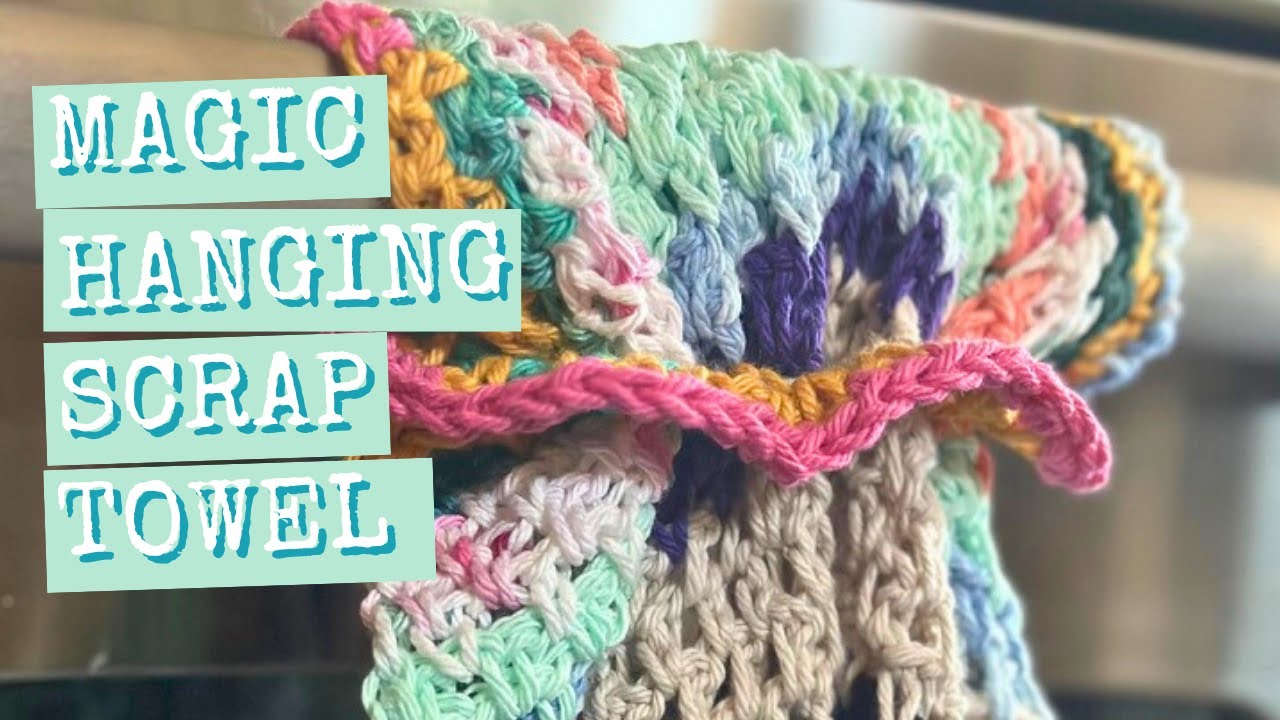
I love this “magic” hanging scrap towel. I mean, there’s nothing magic about how it hangs necessarily, it’s just a loop, but man is it magical to look at with all of those beautiful colors.

I used a scrap ball of cotton yarn for this project. You can chek out the blog: scrap ball of yarn if you’ve never made a scrap ball of yarn before.

Supplies Needed for the Magic Scrap Towel

Yarn: While you can use any color combination of cotton yarn for your scrap yarn towel, I created this pattern specifically to use my scrap cotton yarn and it turned out every bit as lovely as I hoped that it would. You can create your own scrap yarn ball to create the same look. By creating a scrap yarn ball, you don’t have any ends to work in and the color change is really organic and surprising.

Crochet Hook: I used a 4.5mm Clover Amor crochet hook but you can use any size hook to obtain the size and drape you like for your towel.

Magic Hanging Scrap Towel Pattern

This pattern can be adjusted to make your towel larger or smaller depending on what you prefer just by changing hook size or beginning even number chain. My towel is 15X20″ and that’s what I’m sharing below.

Hook Size: 4.5mm

Foundation Row: Chain 56 (or any even number)

Row 1: SC in 2nd ch from hook. *Ch1, SK next Stitch, SC in next st* Repeat from * to *end. CH1 and Turn

Row 2: SC in 1st CH1 space, CH1, SC + Ch1 in each Ch1 space to end. SC in top of turning chain. Ch1 and Turn

Repeat Row 2 until your towel is your desired length (for me that was 70 rows)

Row 71: For Magic Hanging Loop:
Ch1, turn. SC + Ch1 in first 10 CH1 spaces
Create Loop Chain 12
Finish Row: SC+Ch1 in remaining 10 Ch1 Spaces

Row 72: SC in top of turning chain, Ch 1, Turn
Row 73: SC+Ch1 in each Ch1 Space across.

Fasten off, weave in ends using Finishing Needles

These towels hang like magic over towel bars, and yes, stove handles which…do at your own risk because heat and cotton yarn are absolutely not friends.

0 comments
0 FacebookTwitterPinterestEmail
Paper Crafts

Mental Health Tags from Scraps

by Brandy Burke March 8, 2025

The world is weird and I am struggling more than normal – so I decided to channel those struggles and my scrap paper into little tokens and trinkets to leave around town knowing they’ll land in the hands of people who need to read the words.

Any kind of crafting helps me relieve mental stress – busy hands calm my mind and it just makes me feel even better to know I’m creating little mementos, reminders, and motivations that other people will find thoughout their day to lift their spirits, too.

Supplies Needed for Scrap Paper Tags:

For this project, you can use whatever you already own – you know I love a good scrap project and this definitely fits the bill. You do not need to purchase new products – any paper scraps, ephemera, stickers, etc will do the job here – however, if you’re interested in any of the products that showed up in my work, I’ve listed them below.

These are affiliate links. That means if you click a link and make a purchase, I will make a tiny commission. Thank you for supporting this website and my work.
  • Scrapbook paper scraps – whatever you have. Did you know they sell scraps?
  • Label Maker
  • paper punches
    • Heart punch
    • Border Punch
    • Hole Reinforcer Punch
  • glue
  • embroidery floss
  • Washi Tape
  • Literally whatever you have on hand and want to use.

Alternatively, you could make small squares, business card sized items, little circles or hearts with messages. I chose tags because I love creating tags but these can come to life in whatever form or fashion you prefer.

0 comments
0 FacebookTwitterPinterestEmail
Craft OrganizationFeatured

How to Swatch Distress Inks

by Brandy Burke March 8, 2025

I am thrilled to have finally sat down and swatched all of my beautiful Distress Oxides. I wasn’t sure how to swatch distress inks in a way that was usable to me, but I felt so creative during that time that I pulled together this really pretty Distress Oxide Swatchbook and I will absolutely be using it as I swatch my other supplies.

Distress Ink Swatching Video

I'm not affiliated with the Distress products companies however I am an Amazon affiliate so clicking on a link on this blog and making a purchase will provide me with a small affiliate revenue. Thank you for supporting my blog.

Ink Swatching Supplies Supplies Needed

  • 1.5 inch binder rings (here are the 3″ ones I showed in my video)
  • Watercolor Paper (or whatever you use distress oxides on most)
  • Blending brushes
  • Stencils
  • Small stamp
  • Paper Cutter
  • Hole punch
  • Thermal Label Maker (here’s the retro one I showed in my video)

Choosing Paper for Swatching Distress Inks

I chose a watercolor paper that I most often use with my distress oxides so that I could have a real, tangible idea of how my colors would look and behave. That said, I also use a lot of Neenah Cardstock 110# for cardmaking so if I’m feeling really adventurous, I might go back and add a swatch in for each color with that paper as well.

Creating Distress Oxide Swatch Templates

To create my swatch book I cut my watercolor paper at 2.5″ square and used a 1.5 inch binder ring. You could make these larger or smaller according to how you usually swatch your products. If you’re just starting out swatching, then it’s important to consider your space and ease of use for a swatch – do you have room to store an album of swatches? Is it easier to grab a ring of swatches?

Creating the 1/4 inch mask template

Take your paper and line it up at 1.25″ and make a small cut. Next, turn your paper around and line it up again at 1.25″ and make another cut. Use your scissors to finish the cut to remove 1/4 of the tempate.

Creating the Tabbed Templates

Cut your paper at 2.5″ X 2.75″ Mark 1/4 of an inch from the bottom left hand corner. Line the top part of your paper up at the 2.5″ mark on your paper cutter and cut to the mark you made. Finish it off with scissors if necessary. For each additional swatch add 1/4 of an inch. So swatch 1 with have 1/4 inch, swatch 2 will have 1/2 inch, swatch 3 will have 3/4 inch, etc.

Choosing How to Swatch your Distress Inks

I chose to swatch my oxides in the four ways I most use the products. If you use yours most for watercoloring, or another way, you might instead opt to add that to your swatch line up. You could also utilize the back of your card to swatch additional options.

This process can be repeated for any type of ink, marker or medium so grab your watercolor paper an spend a weekend mindlessly swatching all of your products.

0 comments
0 FacebookTwitterPinterestEmail
Crochet TipsLook

How I Make Scrap Yarn Balls

by Brandy Burke February 25, 2025

If you’re a yarn lover like me, you probably have a growing collection of leftover bits and pieces from past projects. I hate letting good yarn go to waste, so I save everything over a foot long in a dedicated bin and anything under a foot long in a freezer sized bag. Today, I’m just talking about the longer bits. Over time, these scraps add up—and when I’m ready, I turn them into colorful, one-of-a-kind scrap balls! Here’s how I do it.

Step 1: Sorting My Yarn Scraps

I start by organizing my yarn by weight and fiber type. Keeping similar yarns together ensures that my final project has a consistent texture and drape and that the care instructions are the same. Once sorted, I group the scraps by color, mixing in a few neutrals to break up the bright hues, I think it creates a more balanced look.

Step 2: Joining the Scraps

To create a continuous strand, I use a magic knot method. Unlike a simple knot, the magic knot weaves the yarn ends together, creating a smooth transition between colors. You won’t feel the join in the final project, and it’s much prettier than the bulky factory knots you sometimes find in commercial skeins.

Of course, there are other ways to join yarn—the Russian join, felted joins (for wool), and spliced joins all work depending on the fiber—but the magic knot is my go-to for its durability and it’s quick to do, which makes a difference when you’re joining many, many scraps together.

Step 3: Winding It Into a Ball

As I join each scrap, I wrap the yarn into a ball, letting the colors flow naturally. This part is always fun because you start to see the unique combination of shades and textures come together.

By the time I finished winding my most recent scrap ball collection, I had 57 ounces of yarn—about the equivalent of seven skeins from Joann or Michaels! It’s amazing how much yarn you can save over time.

Step 4: Putting It to Use

For my latest scrap yarn project, I crocheted a moss stitch blanket in rainbow order, and I absolutely love how it turned out. The mix of colors and textures makes it feel special, and knowing that it’s made from leftover yarn makes it even more meaningful. Earlier in the year, when I joined all of my cotton scraps together, I created scrap yarn bucket hats which turned out amazing.

Final Thoughts

If you’re not already saving your scraps, I highly recommend it! Scrap balls are a great way to get creative, reduce waste, and make something truly unique. Whether you use them for blankets, amigurumi, or even scrappy granny squares, you’ll be surprised at how much beauty can come from what was once considered leftovers.

0 comments
0 FacebookTwitterPinterestEmail
Crochet

The Best Crochet Stitches for Stress Relief

by Brandy Burke February 25, 2025

I’ve struggled with an endless loop of racing thoughts…aka anxiety for as long as I can remember. I talk about this a lot on social media and I’ve tried a lot of different things (medicine, therapy, tapping) –  I recommend all of them. But when I pick up my crochet hook and let my hands move through rhythmic motions, my mind finds little moments of peace, too. Crochet is more than just a craft or a creative outlet for me – it’s a form of meditation and a tool for relaxation. Some stitches and patterns can be complicated, require you to focus a little more than I sometimes have the capacity to, or can be frustrating. If you’re looking for the best relaxing crochet stitches to quiet your mind, these three stitches: V stitch, Moss stitch, and Puff stitch are perfect for mindful crochet and easing anxiety.

1. V Stitch – A Soothing, Flowing Rhythm

The V stitch is a personal favorite for when I need to get into a relaxing flow. It’s made by working a double crochet, chaining one, and then making another double crochet into the same space. It creates an airy, open texture. The repetition is simple using simple basic stitches but it’s satisfying making it one of the best relaxing crochet stitches.

Why I love it:

  • The repetition of the V stitch allows you to get into a calming rhythm, kinda like deep breathing exercises.
  • It uses double crochets which are nice sized stitches, making it easy to see progress without feeling overwhelmed.

2. Moss Stitch – A Gentle,hug for my brain

The Moss stitch (also known as the Linen or Granite stitch) is another great choice for mindful…or mindless crochet. It consists of alternating single crochets and chain spaces, which creates a soft, woven texture. This stitch is great for crocheters who want a steady, easy rhythm to follow.

Why it’s great for anxiety relief:

  • The slow, repetitive pattern allows you to focus on each stitch, keeping your mind engaged in what you’re doing.
  • Its makes a dense, cozy fabric so it’s ideal for projects like blankets and I love covering up with a blanket while I work on it.
  • Because it uses really simple stitches, it’s beginner-friendly and doesn’t really require a lot of counting, making it perfect for stress-free crochet sessions.
Colorful moss stitch blanket next to lavender, teal, and pink balls of yarn

3. Puff Stitch – A Soft, Tactile Comfort

For those moments when you need something more tactile, I like the puff stitch. This stitch involves pulling loops up to create a soft, raised texture that feels incredible to the touch.

Why I Love It:

  • The physical act of pulling loops and creating puffy clusters provides a satisfying experience that distracts from anxious thoughts.
  • Because it requires slight concentration, it keeps my mind gently engaged so I get a little mental break from worry.

Mindful Crochet: A Simple Way to Ease Anxiety

Crochet for anxiety is about creating a moment of calm amidst the chaos in life and in my brain. When I crochet, my busy hands help quiet my mind, turning restlessness into something tangible. If you’re looking for a soothing hobby or a meditative practice, trying these best relaxing crochet stitches can be a simple yet powerful way to reduce stress.

If you’ve been searching for a way to unwind, pick up a hook, grab some yarn, and let these stitches guide you to a more peaceful state of mind. Your hands and your brain will thank you.

*Crochet is not a replacement for therapy with a professional and prescribed medications as needed. Talk to your doctor.

0 comments
0 FacebookTwitterPinterestEmail
Craft Organization

What’s on my Craft Desk

by Brandy Burke February 21, 2025

I love sharing my craft studio with you and one of the newer additions is my craft desk – so in today’s video I walked you through the desk and everything I keep close at hand that you don’t always get to see in my video – below the video you’ll find links to all of the products I shared.

I’m in between craft room tour videos but one thing that seems to change often lately is what I actually keep on my craft desk. Most items are, strangely, related to something I’m a little anxious about – like the silicon mat so I don’t stain the desktop and the clip on cup holder so I don’t risk a spill on my work (or risk dehydration!)

In a lot of ways, my craft desk is much more personal to me than my work desk, which I spend many many hours more at each day – my craft desk reflects the things that are making me happy at any given time and is my place of peace.

THESE ARE AFFILIATE LINKS so if you click them and buy the product I will receive a small commission. Thanks for supporting me.
  • Here’s a link to my craft desk and everything on it
  • Here’s a link to my yarn wall supplies

Whats on your craft desk or table? How often do you rotate out supplies and projects? Let me know in the comments below!

0 comments
0 FacebookTwitterPinterestEmail
Crochet

Master the Puff Stitch: A Step-by-Step Crochet Guide

by Brandy Burke November 22, 2024

The puff stitch is a favorite in the crochet world, it creates this fun textured fabric with its signature raised, puffy appearance. It’s eye catching, adds dimension and interest, and is all around just a fun stitch to work.

Ready to master this versatile stitch? This post will walk you through each step of creating perfect puff stitches, from basic techniques to pro tips. You’ll discover why crocheters love incorporating this stitch into:

  • Cozy blankets and throws
  • Stylish scarves and shawls
  • Decorative home accessories
  • Beautiful sweaters and garments

Whether you’re a beginner looking to expand your skills or an experienced crocheter seeking new texture options, the puff stitch offers endless creative possibilities. Let’s dive into this step-by-step guide and unlock the secrets of crafting beautiful, puffy perfection in your projects.

Understanding the Puff Stitch

The puff stitch is a unique crochet technique that adds beautiful dimension to your work. Unlike the basic half double crochet, which creates a flat fabric with a single yarn over and pull-through motion, the puff stitch builds volume by stacking multiple loops in a single stitch space.

Let’s break down its unique structure:

  • Height: Creates a raised bump that protrudes from the fabric’s surface
  • Composition: Combines 3-5 incomplete half double crochet stitches
  • Texture: Forms a rounded, cloud-like appearance

The magic of the puff stitch lies in its construction method. You’ll work multiple yarn overs into the same stitch space, pulling up loops to equal heights. These loops cluster together, creating a three-dimensional effect that transforms flat fabric into a textured masterpiece.

Picture a tiny bubble emerging from your crochet work – that’s the essence of a puff stitch. The number of loops you create determines the fullness of your puff, allowing you to customize the texture based on your project needs.

Step-by-Step Instructions for Crocheting Puff Stitches

Let’s break down the puff stitch into simple, manageable steps:

1. Insert Your Hook

  • Insert your hook into the designated stitch
  • Yarn over (YO)
  • Pull up a loop to the height of a double crochet

2. Create Your Loops

  • Yarn over
  • Insert hook into the same stitch
  • Pull up another loop
  • Repeat this process 3-5 times
  • You should have 7-11 loops on your hook

3. Complete the Puff

  • Yarn over one last time
  • Draw through all loops on your hook
  • Chain 1 to secure the puff

Pro Tips for Perfect Puffs:

  • Keep your loops loose enough to work with but tight enough to maintain shape
  • Pull each loop up to the same height for consistency
  • Make sure your yarn over technique remains consistent throughout
  • Hold the loops on your hook with your index finger while working

Common Loop Combinations:

  • 3 yarn overs = 7 loops (small puff)
  • 4 yarn overs = 9 loops (medium puff)
  • 5 yarn overs = 11 loops (large puff)

Your puff stitch should pop out on the right side of your work, creating a beautiful raised texture. The number of loops you choose affects the size and fullness of your puff – experiment with different combinations to find your preferred style.

Additionally, if you’re looking to incorporate some interesting textures or patterns in your crochet project, you might want to explore some crochet rib stitches and ribbing techniques that can complement the puff stitches beautifully.

Exploring Variations of the Puff Stitch

The beauty of puff stitches lies in their adaptability. You can create different sizes and textures by adjusting the number of yarn overs in each stitch:

1. Tiny Puffs (3 loops)

  • Perfect for delicate baby items
  • Creates subtle texture
  • Works well in tight spaces

2. Medium Puffs (5 loops)

  • Standard size for most projects
  • Balanced appearance
  • Great for blankets and scarves

3. Large Puffs (7 loops)

  • Creates dramatic texture
  • Makes bold statements
  • Excellent for accent pieces

The size of your puffs affects the drape and weight of your finished piece. Smaller puffs create a more flexible fabric, while larger ones add substantial structure and warmth. You can mix different puff sizes within the same project to create unique patterns and visual interest – try alternating sizes in rows or creating gradient effects from small to large puffs.

Remember that larger puffs require more yarn and create a denser fabric, so consider your yarn choice and project requirements when selecting your puff size.

Tips for Success in Crocheting Puff Stitches

Creating beautiful, uniform puff stitches requires mastering tension control. Here’s what you need to know:

  • Hold Your Yarn Consistently – Wrap the yarn around your fingers the same way each time you crochet. This creates muscle memory and helps maintain steady tension.
  • Watch Your Loop Height – Pull up each loop to the same height as you work. A ruler can help you measure until you develop an eye for consistency.
  • Mind Your Chain Spaces – Keep chain spaces between puffs relaxed – too tight and your puffs will pucker, too loose and they’ll look uneven.
  • Check Your Work – Pause every few rows to compare your puff sizes. If you spot inconsistencies, adjust your tension before continuing.
  • Practice Mindful Speed – Work at a steady pace rather than rushing. Speed variations can lead to irregular puff sizes and shapes.

Practicing Your Puff Stitch Skills

Ready to master the puff stitch? Here’s a simple practice routine to build your skills:

1. Start with a Chain-10 Swatch

  • Create small practice swatches
  • Focus on single puff stitches
  • Perfect your tension control

2. Loop Practice Exercise

  • Pull up loops to equal heights
  • Practice holding multiple loops on hook
  • Work on consistent yarn tension

3. Speed Building Drill

  • Set a timer for 5 minutes
  • Create as many puff stitches as possible
  • Check each puff for uniformity

Pro Tip: Create a practice notebook with swatches of different puff sizes. Label each swatch with the number of loops used and note which tension works best for your style.

Remember: Practicing with scrap yarn lets you experiment freely without worrying about mistakes in your actual projects.

Conclusion: Embrace Your Creativity with the Puff Stitch!

The puff stitch opens up a world of creative possibilities in your crochet journey! Now that you’ve mastered the basic techniques, it’s time to let your imagination run wild.

Ready to unleash your creativity? Here’s what you can do:

  • Mix puff stitches with other basic stitches to create unique textures
  • Play with different yarn weights to achieve varied effects
  • Design your own patterns incorporating puff stitches
  • Experiment with color combinations to highlight the textural elements

Your newfound skills can transform simple projects into eye-catching masterpieces. Think cozy blankets with scattered puff stitch clouds, elegant shawls featuring delicate puff stitch borders, or trendy bags showcasing bold puff stitch patterns.

Remember – there’s no “right” way to use the puff stitch in your designs. Each project you create becomes a unique expression of your creativity. Whether you’re making baby booties or a statement wall hanging, the puff stitch adds that special touch that makes your work stand out.

So grab your hook and favorite yarn – it’s time to create something amazing! Share your puff stitch projects with fellow crocheters and inspire others to explore this versatile technique. Happy crocheting! 🧶

FAQs (Frequently Asked Questions)

What is the puff stitch in crochet?

The puff stitch is a textured crochet stitch created by working multiple yarn overs and pulling up loops to form a raised texture on your fabric. It differs from other stitches, such as the half double crochet, by its unique dimensional appearance.

How do I start crocheting puff stitches?

To start crocheting puff stitches, determine the appropriate starting chain length for your project. It should be a multiple of two plus four to ensure proper placement of the puff stitches throughout your work.

What are the steps to create a puff stitch?

To create a puff stitch, you will yarn over and pull up a loop multiple times (typically 3-5), then complete the stitch by securing it. Make sure to finish off your puff stitch properly so it holds its shape and maintains stability.

Can I vary the size of my puff stitches?

Yes! You can adjust the number of yarn overs when creating your puff stitches to achieve different sizes. This adjustment will affect both the texture and overall appearance of your crochet project.

What tips can help me succeed in crocheting puff stitches?

Maintaining even tension is crucial for achieving uniformity in puff sizes. Practice techniques to avoid inconsistencies, ensuring all your puffs look consistent and well-defined throughout your work.

How can I practice my puff stitch skills effectively?

To improve your technique, practice yarn overs and pulling up loops before tackling complex patterns or projects. This foundational practice will enhance your confidence and skill level in crocheting the puff stitch.

0 comments
0 FacebookTwitterPinterestEmail
Knitting

Unique Adult Crochet Beanie Patterns

by Brandy Burke November 16, 2024

I love a good crochet hat – I don’t necessarily wear a lot of hats, but I love to make them – and I’ve probably made…50-100 in my lifetime? Usually I err on the side of a simple beanie, something I don’t have to think about while I sit and watch my favorite shows on netflix – but I’m ready to step up my game and I’m absolutely obsessed with these adult crochet beanie patterns that add a lot of fun and wow.

I am an etsy affiliate and this post contains affiliate links. This means that if you click on a link and make a purchase I may earn a commission. 
  1. Gianna knit-look slouchy cropped beanie by Simplepatterndesigns
    Features: Slouch style, large detailed photos
  2. Winter berry hat by MissKochkina
    Features: Experienced level, video tutorial (Russian)
  3. Nightfall’s Beanie by JillyMarieCo
    Features: Graph style pattern
  4. Majestic Crochet Hat pattern by MajesticArtCrochet
    Features: Video tutorial
  5. Pine Woods Beanie by kathyscrochetcloset
    Features: Stitch Chart
  6. The Blue Mountain Beanie -by CozyColeCreations
    Features: Intermediate Skills

How to Choose the Best Yarn for a Crochet Hat

The best yarn for a crochet hat depends on the season, but generally, a soft, medium-weight yarn like worsted weight is a great choice. For warmth and comfort, acrylic or wool blends work well—they’re cozy, hold their shape, and are easy to care for. If you’re making a summer hat, go with breathable cotton or bamboo yarn for a lighter, cooler feel. Whatever the fiber, choose a yarn that feels soft against the skin and offers good stitch definition for a polished finish. You should refer to your crochet hat pattern for yarn recommendations to ensure that your project turns out as expected.

To Pom Pom or Not to Pom Pom

It’s a real question. I personally don’t love pom poms on my hats, but the finish without the pom poms is often lumpy and weird – a pom pom adds a little character and covers up the circle at the top of the hat. You can make a yarn pom pom with matching yarn or purchase premade faux fur pom poms in various colors.

0 comments
0 FacebookTwitterPinterestEmail
Paper Crafts

Health Tracker Planner Printable

by Brandy Burke November 15, 2024

This health tracker planner printable freebie was on my old blog – when I transferred over to this new domain, I left it in the dust. I’ve worked in the health industry for a long time and I hate diet culture. After getting many requests for it on Pinterest (because the links were dead) I realize that it still supports some people in adopting a healthy lifestyle – so I’m resuscitating it – free – use it wisely and carefully.

It’s sized to fit in a regular happy planner, right justified to make room for you to punch it and add it in anywhere you’d like – but you can use it in other printers as well.

I love a good planner printable and I love it more when it’s free – this couples both of those awesome things together into one just for you – just for being a subscriber to my email list. 

Once you subscribe to my email newsletter and confirm you’ll be served a link with all of my freebies. This includes planner printables, crochet care cards, and even a pattern or two!


Subscribe For instant Freebies AND stay updated!

0 comments
0 FacebookTwitterPinterestEmail
Yarn Crafts

Yarn Wrapped Christmas Tree Gift Toppers

by Brandy Burke November 15, 2024

Here’s a cute way to use up some of that scrap yarn and a….cereal box? These yarn wrapped Christmas trees make adorable bag tags, gift toppers, even little ornaments for the tree – and you’ll only need whatever you have on hand! It’s a perfect use for your scrap yarn and little bits and bobbles of embellishments you have laying around the craft room. While I used hot glue for mine, you can really use any glue you have on hand as well making this just an incredible way to declutter the craft desk and create something really cute and useful for the Holiday season.

Every page and post on this blog may contain affiliate links. That means if you click on a link and make a purchase within a given time frame I may earn a small commission.

Supplies Needed

  • Cardboard (I used a cereal box) but any cardboard you have left over will do the trick.
  • Scissors – the sharper the better – match the safety to the age of the user
  • Hot Glue Gun – you can also use school glue or any other type of glue you have on hand.
  • Yarn
    • Alt: Twine, ribbon
  • Embellishments
    • Sequins, buttons, pom poms, die cuts, glitter, beads – whatever you have on hand!
  • Triangle Guide (optional)

Instructions

Start by cutting out triangles from your cardboard. I’ve shared the triangles that I used for this project so that you can easily print and get started.

Cut about 6 inches of yarn and fold it in half. Glue it to the top of the triangle

Add some glue close to the top of the triangle and begin wrapping your yarn. I found that if I started about 1/4 of an inch from the top and wrapped up and then back down, I got a better wrap. Add hot glue as you go, wrapping the yarn all the way down.

You can choose to stop here or wrap randomly to create some fun texture.

Now, all that’s left is to add your embellishments!

Grab the Kids!

This could be a great craft for the kiddos with supervision (especially if using a glue gun!) and a great way to get them into the handmaking spirit for the holiday season. Be sure you check out my crochet ornaments blog posts to use up more yarn and creativity for the holiday this year!

0 comments
0 FacebookTwitterPinterestEmail
Newer Posts
Older Posts
Dishie yarn by Crochet.com

Recent Posts

  • DIY Crochet Earmuff Patterns You’ll Actually Want to Wear
  • Pink Bow Baby Shower Theme
  • Table Cloth Bows for Baby Showers
  • Crochet Baby Bootie Centerpieces for Babyshowers
  • Free Haunting Handmade Item Caretag

Recent Comments

  1. Joyce Melonson on Small Crochet Granny Square Earrings
  2. Crochet For Cancer Printable - on Crochet Chemo Caps
  3. The Best Yarn Storage - on Craft Room Tour
  4. My Best Yarn Tips - on Free Work in Progress Notes Printable
  5. My Best Yarn Tips - on Yarn Bowl Alternatives

Subscribe For instant Freebies AND stay updated!

Hook and Paper is a participant in the Amazon Services LLC Associates Program, an affiliate advertising program designed to provide a means for sites to earn advertising fees by advertising and linking to amazon.com. “This site uses cookies from Google to deliver its services and analyze traffic. Your IP address and user-agent are shared with Google along with performance and security metrics to ensure quality of service, generate usage statistics, and to detect and address abuse.”

Facebook Twitter Youtube Linkedin Envelope Rss

Useful Links

    • Work With Us
    • Contact Us
    • Collaboration
    • Adverstising
    • Privacy Policy
    • Feedback
    • Terms of Use

Edtior's Picks

DIY Crochet Earmuff Patterns You’ll Actually Want to Wear
Pink Bow Baby Shower Theme
Table Cloth Bows for Baby Showers

Latest Articles

DIY Crochet Earmuff Patterns You’ll Actually Want to Wear
Pink Bow Baby Shower Theme
Table Cloth Bows for Baby Showers
Crochet Baby Bootie Centerpieces for Babyshowers

©2024 Hook and Paper

  • About
  • Policies
  • Affiliate Disclosure
  • Contact Us
  • What is Crochet
Hook and Paper
  • About
  • Crochet
    • Crochet Tips
    • Crochet Tools
    • Crochet Patterns
    • Crochet Printables
  • Crafting
  • Craft Organization
  • Contact Us